Posts

Showing posts with the label Repurposing

Craft Organization - Die Storage (Sizzix Alphabets & Small Dies)

Image
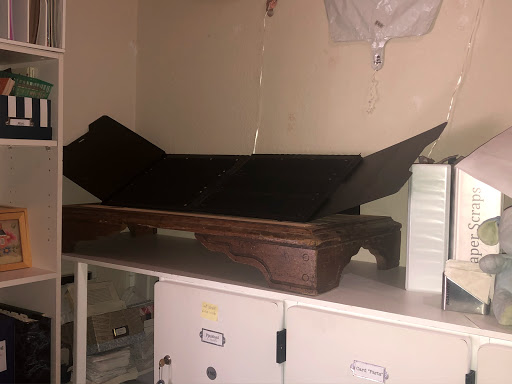
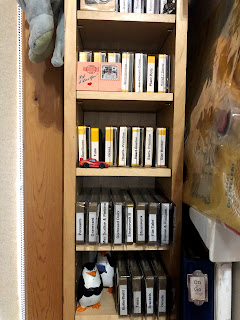
     I suppose the short version of this quick idea is that I put my Sizzix alphabet sets and smaller dies into a cabinet that doubles as the base of one side of my craft table.      Once my boys were grown enough to stop using a changing table, I took the wooden "guard rails" off.  While unpacking my craft supplies after our last move, I decided to try to use it for some dies and liked how they fit.  I also liked the white color and the beadboard details on the cabinet door enough to make it the end of the craft table hubs made.       It's divided into two sided - a side with "open" shelves and the other with a cabinet door.  Both sides have 3 shelves.  On the top shelf of the cabinet, I've put Sizzix Alphabars and other small sized alphabet blocks, some in their original boxes.      The thinner, Sizzlit alphabet sets stack 3 high on the middle shelf.      The bottom shelf has small dies in p...

Craft Organization - Dresser Bottom to ScrapRack Support

Image
     What do you get when you combine the bottom of a dresser with the Totally Tiffany ScrapRack?      You might get what I did:      Why do this?  Honestly, it started due to a misunderstanding - but ultimately, gives me more counter space.  I have put 3 of my rolling cart drawers underneath, freeing up some room in my bookcase.      Hope you're doing well and maybe I was able to encourage you to try something that may seem odd until you find out it works for you. (On with the yammer. . .)      Before making a top for my lockers, my ScrapRack was clamped to a scrap of wood that covered the gap between lockers.  I had to clamp it because it kept tipping over, even after I went through it and thinned it down.  After I made the top, I used filled plastic containers to weigh it down.      A combo of having time to kill, a desire to use more of an old dresser, and an inclinatio...

Craft Organization - Thrift Store to Project Supply Holder

Image
     This metal piece at a Salvation Army store "leapt" out at me.  I've never seen anything like it so I didn't know what it's missing "base" was supposed to be or look like.  I had to use my very limited imagination to make it useful.      I decided to turn it into something to hold supplies, similar to a small Clip-It-Up.  I searched for some clip ideas.      At IKEA, I found these shower / curtain hooks.      I could also use the paperclip looped thru' a clothespin idea. . . I found 3 sizes, all reasonably priced at Dollar Tree and at Walmart.      Depending on what I'm hanging, I could also go with some free options by using old pencil pouches and various packaging from socks, curtains, or plastic clam shells that have the store display punch cut out. . .      Now, I needed a "base."  For height, I used a wooden dowel in a Coke bottle.  To prevent it from tipping, the ...

Craft Organization - Copic Markers

Image
     As you probably know, Pinterest has many beautiful pictures of Copic storage.  Pictures of products like Art Bin Marker Storage or units built for IKEA Expedit  and homemade versions using  ovc electrical  conduits, egg crate ceiling light tiles,  cut pvc pipes, glued CD cases, and repurposing cassette or CD storage racks.      I had one of the later, so I used it.      Unlike most of the pinners I saw, I used cut acrylic sheets I already had to create "shelves" instead of empty CD cases.  They take up less space and make it easier to grab the markers.      Thanks for looking.  Hope you're doing well!   (On with the yammer. . .)     This isn't my first Copic storage.  After taking a card making class, I went out and bought some stackable, plastic containers from Target on a recommendation from the teacher, Irina Blount.   (A few years after I took some of her...

Craft Organization - Die Storage (thin metal types)

Image
     My last post was about the top part of my die cabinet  (here) , so thought I'd share the bottom part where I put my Sizzlits and other thin dies.      I use page protectors.  Loaded page protectors can go into binders, fridge bins, baskets, magazine files, boxes, or even be tied together with string or a loose ring.      My Sizzlits are in either regular page protectors (I sewed pockets into them)  or baseball card protectors, then put into a binder.      My thin, metal dies are placed on magnetic vent covers before going into page protectors and placed into a Ritz box from Costco.      Thanks for checking my quick idea out.  If you have another system or idea, please share - I'm very interested and I'm sure I'm not the only one.      As always, I hope you're doing well and hope that maybe I sparked a bit of creativity or courage in you! (On with the yammer. . .)   ...

Craft Organization - File Cabinet Die Storage (Sizzix original/Bigz)

Image
     Some might argue that being crafty is all about making things.  I think sometimes it's about using what you have and making it work for you.      I took an unused file cabinet and made it store the thick, steel-rule dies.      Along the right side, you can see the magnetic labels I made to help find dies easier.      Thin plywood lines the bottom of the drawers and create dividers to help keep rows and themes separate, even if the drawers get slammed shut.  This can fit Sizzix original, Bigz, XL, etc. - the small and medium dies could fit, but might be a little difficult to take out.  The only ones that wouldn't fit are the Pro sized dies.  If I were to put the small or medium ones in here, I'd probably put them in boxes or baskets to make it easier to get to them.  I didn't try that because I have them in other areas.      Thanks for checking my idea out.  Hope you're doing ...

Craft Organization - Punch Storage

Image
     In the last post, I talked about trying to find something that went with my medium dies to put into the IKEA Gnedby I have.  The thought is to keep similar items grouped together to ease finding things and keep organized better.      What else cuts paper into shapes?      Punches!             The grey box in the picture on the right = my old, quick solution to organize smaller punches.  It's two boxes duct taped together.  The duct tape didn't just keep them together, it covered the labels and made a handle I used to lift it out of the shortbread cookie tin I originally put it in.  Other punches fit on the bottom of the tin and I used this on top with my more-used punches.      Hope you're finding ways to keep yourself sane whether you're stuck - I mean, staying, inside with other people or not. (On with the yammer. . .)      Although the dowel/rack/curt...

Craft Organization - Die Storage (Sizzix Medium Sized)

Image
     I already had a picture of this idea in a previous post, but thought I'd revisit it to explain the storage idea.  I use an IKEA Gnedby (designed for CD/DVDs) to store my medium sized Sizzix dies.  The unit is deep enough for them, even after I put in scraps of beadboard in the back to give it a detail some other pieces in my craft space have.      I used my Dymo label maker to make it easier to find the die I'm looking for.  I think I'm going to paint it white to match the rest of my craft corner furniture, but don't have the paint and it's not critical, so I'll wait for things to cool off (literally & figuratively) .      Thanks for checking my idea out.  Hope you're doing well and maybe I helped spark a bit of creativity or courage in you to do something with unloved furniture! (On with the small yammer. . .)      Once we moved into our current home, we realized we didn't want to use our Gnedby ...

Craft Organization - Die Storage (Sizzix Pro)

Image
     Quick post today -      While unpacking some of our office supplies after our move, I came across a metal incline desktop sorter like this.      It was perfect to store my Sizzix Pro Dies!  No altering needed! Thanks for checking out one of my quick organization solutions - hope you're doing well and hope that maybe I sparked a bit of creativity in you! (On with the yammer. . . .)      When I was living in Southern California, I was lucky enough to be able to make it to a Sizzix Warehouse sale where I was able to buy a few Sizzix Pro dies.  I didn't have a machine big enough to use them yet, but they were very discounted and I had access to some Ellison machines at work.  (I did use 2 for work purposes, but they were a great deal and I figured I could always resell them for a small profit if I needed to.)       Some time after moving, I had started unpacking a few crafty things during...

Quarantine Project #4 - Drawer Shelf Unit

Image
     I had space under my craft table and wanted to make a bookcase.  With COVID still an issue, I decided to get creative and just get it done.  I used some drawers I had.      I checked to make sure they fit in the space, then had to decide the spacing.   (I used an empty box to help me guess better.)       I attached feet for the two upper drawers to the middle drawer so the upper and lower drawers could slide out.  I used wood glue to attach more scrap wood to the thin underside of the middle drawer for extra stability.  Using the supplies and limited skills I have, I decided to keep it simple and use three long "support beam" being held up by feet for the upper drawer.  (Anyone who wants the correct terms, I chose to use a butt joint.)      Biscuits and wood glue were used to connect all the pieces.   I used a sealant inside the drawers to prevent more splinters.   ...

Craft Organization - Graham Cracker Boxes to Card Storage

Image
     Some time after seeing cute, mini magazine holders a few talented women made online, I noticed that graham cracker boxes from Costco were a good size for my cards. . .and came up with these.       The boxes were a little flimsy, so I opened them up and glued another layer of cardboard (from other boxes) .     I glued the box back into shape, decoupaged, and added some metal apothecary-type pulls from Amazon to the fronts (the ones I ordered are no longer available, but there are many others - just search for label pull handles and you should find similar ones) .  I just wanted to make sure I like the grouping inside before I made labels.      Thanks for checking out my quick project  - hope you're doing well and hope that maybe I sparked a bit of creativity or courage in you!  (But - if you raid your pantry and take any cardboard boxes, think of labeling any bags you take out if they're not easily...

Craft Organization Idea - Old Cassette Storage Boxes

Image
     Short version - I pulled off the original covering off two cassette storage boxes, painted the inside, decoupaged the outside.  Still unsure what I'm putting inside or how I'm doing it . . . any suggestions? - hope you're doing well and hope that maybe I sparked a bit of creativity or motivation in you! (On with the yammer. . .)      I've had two old cassette storage boxes for a loooonnnnggg time, but I've been trying to figure out how to use them.  I've seen other blog posts showing pictures of them painted.  They say they've used them to organize craft supplies, but I haven't seen or read what they've actually put in them or how they've done it.  I'm thinking I could use them for die cuts or embellishments, but I'm still working the details out.  Did they use the old cases?  Did they use the slots like others do with ink pads?  Did they do something else??      I decided to answer those questions lat...

Trying to Cover Trophy Halos

Image
     The previous owner of our home had some hunting trophies mounted and they left "halos."  We're not hunters, so simply replacing them was not an option.      Actually, why not?  With our favorite characters, that is.  How?  Halloween treat buckets!  The halos still show, but it's not as obvious as when it was bare.  Grabbing them on clearance helped encourage/motivate me to do it.  (Maybe you have a few in your Halloween stash?)       I cut off the plastic handles and used my Crop-a-dile to make holes in the backs of the buckets.  I looped some fishing line through the holes and hung them each on a hook screwed in the wall.  (I had used adhesive hooks, but the adhesive couldn't stick to the stain and they started popping off after a week or so.  Had hubs grab 4 hooks while he went shopping and a week later, had the time and courage to screw them up.)   I le...

Repurposing into Organization

Image
     Quick idea: before you toss/recycle something, look at it.  Try to see if it can be used as is or if you can modify it somehow for your needs.  (What/how you modify depends on your knowledge & skills.)         Try to see if you can use it alone or with something else.  Shape and size are a little important, but play around with it.  Sometimes it can be cut down, sometimes it just needs to be rotated, and sometimes it can be part of something else.  If it's flimsy, you can double up walls and/or decoupage it for added strength.  (I cut a cereal box in half to make it thinner and sturdier.)   Maybe it can be attached to another box or put inside something else to help organize things (I found a hot chocolate mix box is almost the same width as a photo box from Michael's and I use a few of them to help sort my photos better) .      Just a quick idea this time - we've been busy w...

Small Craft Organization Idea - Reusing Rolling Cart Drawers

Image
     Super simple idea, but wanted to post something in case it could help someone else. . .      My boys had stopped using the rolling carts with drawers that most stores seem to have.  (I think we got our from Costco years ago.)   They had bent the metal frame - so I couldn't use them as they were.      I had to toss the frame, but I've used the drawers for two main reasons. . .      1.) Storage -  I use them for a few things, one being for my rulers.  It's pretty handy because I can quickly grab one or bring the whole thing to my table when I need to.      2.) Group things for projects - They keep most supplies I need to finish a project in one area.  The drawers make it easy to move things around.  I can go from working on something to putting it away without worrying that I'm forgetting or losing something.  I tend to start and put things on "pause" quite a bit - mos...