Posts

Showing posts with the label Decorating

Craft Table (Adjacent) Shelf

Image
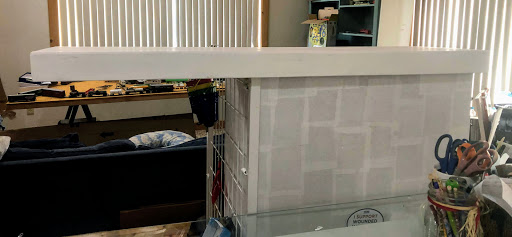
     A video on YouTube (Connie Stewart's craft room tour video, shown here ) inspired me to have a shelf near my craft table.      I found an unused wooden piece and put it on top of my file cabinet to see if it'd work for me.  I figured I could decide if I liked it there or if I wanted it on my table like in the video.  I've put a few things on it and now that I covered the file cabinet, I decided to fix it up as well.      It had a thin edge slightly attached with a few biscuits, so I clamped it and used wood glue.  After the glue dried, I painted it and put it back.      Hope you're doing well and hope that maybe I sparked a bit of creativity or courage in you! (on with the yammer. . .)      Years ago, while watching craft room tour videos on YouTube and trying to get inspired and figure out what to do with my craft space, I came across one tour that had a shelf on a craft table.  I was in...

Quarantine Project #5 - Altering an Old, Metal File Cabinet

Image
     I didn't take a before picture - it was ugly and I didn't have the right equipment, but I just wanted to get this done.     This is what it ended up looking like. . .      I removed the drawers, which isn't difficult - just needed to get them out of the sliding unit.  Once the drawer is opened all the way, pull more.  Some cabinets need a little jerk to go past the drawer stop, others need to be lifted a little, but not too much or the slider will come out with it.  (If the sliding unit did come out - no worries.  Still take it off the drawer and put it back because it will make things more difficult if/when you move the drawer around.)       To remove the bookplate and handle, unscrew the two screws for the handle -  you might need an allen wrench * .  That will allow a plate/cover on the inside of the drawer to be removed and expose the metal tabs to remove the bookplate.  (Yo...

Trying to Cover Trophy Halos

Image
     The previous owner of our home had some hunting trophies mounted and they left "halos."  We're not hunters, so simply replacing them was not an option.      Actually, why not?  With our favorite characters, that is.  How?  Halloween treat buckets!  The halos still show, but it's not as obvious as when it was bare.  Grabbing them on clearance helped encourage/motivate me to do it.  (Maybe you have a few in your Halloween stash?)       I cut off the plastic handles and used my Crop-a-dile to make holes in the backs of the buckets.  I looped some fishing line through the holes and hung them each on a hook screwed in the wall.  (I had used adhesive hooks, but the adhesive couldn't stick to the stain and they started popping off after a week or so.  Had hubs grab 4 hooks while he went shopping and a week later, had the time and courage to screw them up.)   I le...

Quarantine Project #3 - Unfinished Side of a Locker

Image
     So far, my posts have been about the corner in my craft corner.  I have one item left to do, but I have to wait to get supplies, so I don't know when it'll get done.  In the meantime, there is an area that could use an upgrade.      I wanted to tackle an unfinished side on one of my wooden lockers.  After thinking about it, I made a plan on paper.  I traced my plan on the side using a pencil to quickly check things out.  Then I took a miter saw to some scraps.      Did a dry run to check if any adjustments were needed - and see if I was sure I'd like it.  Once I was sure of myself, I got our brad gun out and nailed in the top, bottom, and side pieces.      I couldn't find any scraps/pieces for the middle, so tried just painting the area with the acrylic paint I have.  Nailed up a lamp to see if paint job would work. . .      That's the project in a nut shel...

Quarantine Project #2B - IKEA Gnedby

Image
     As I posted before, I had some extra beadboard. . . and used it to make more pieces in my craft corner seem more like a matched set.      I didn't have a piece big enough to fit the whole back and didn't want to disassemble the IKEA Gnedby unit, so I just measured all the spaces and ended up doing a lot of cutting with the miter saw.  I measured things as well as I could so the grooves in the beadboard would be in the same place on all of the shelves.   (I planned a little ahead so I ended up cutting all the pieces I've used in a few projects all at once.)      For now, I've just placed the pieces in and put my supplies on the shelf.      Thanks for checking out my quick project  - hope you're doing well and hope that maybe I sparked a bit of creativity or courage in you! (on with the yammer. . .)      Sorry I didn't take a "before" pic, but it's not that different.  ...

Quarantine Project #2A - File Cube

Image
     I had some extra beadboard from when an IKEA closet needed a stronger back. . . and a desire to use it to make pieces in my craft corner match.  I tried to plan things so I could do all my cutting for projects I've lined up all at the same time.      This project was pretty simple, but I like the results.  It was just 4-5 simple steps. 1.)  Cut beadboard to size. 2.)  Unscrewed the metal pull. 3.)  Glue beadboard in  (this time I just used good ol' Elmer's White Glue). 4.)  Re-screwed the pull back on. *5.)  I didn't cut everything "right" so the edges weren't perfect.  I used a little DryDex Spackling  (using my finger) to compensate .      I like how I didn't get the screws on the pull onto one of the grooves.    It's housing my Christmas cards, etc. so won't be used all that often. - hope you're doing well and hope that maybe I sparked a bit of creativity or ...