Posts

Showing posts from September, 2020

Craft Organization - Dresser Bottom to ScrapRack Support

Image
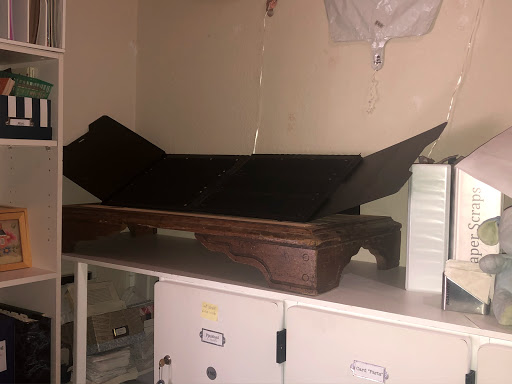
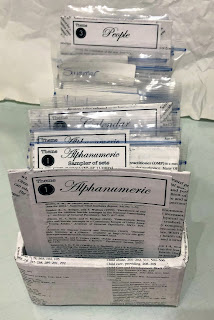
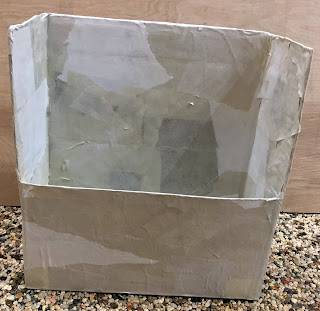
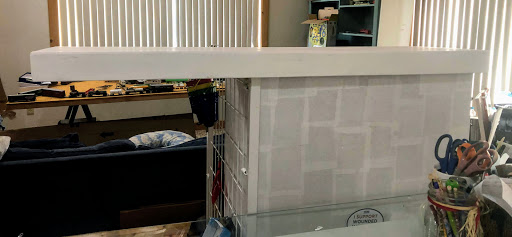
     What do you get when you combine the bottom of a dresser with the Totally Tiffany ScrapRack?      You might get what I did:      Why do this?  Honestly, it started due to a misunderstanding - but ultimately, gives me more counter space.  I have put 3 of my rolling cart drawers underneath, freeing up some room in my bookcase.      Hope you're doing well and maybe I was able to encourage you to try something that may seem odd until you find out it works for you. (On with the yammer. . .)      Before making a top for my lockers, my ScrapRack was clamped to a scrap of wood that covered the gap between lockers.  I had to clamp it because it kept tipping over, even after I went through it and thinned it down.  After I made the top, I used filled plastic containers to weigh it down.      A combo of having time to kill, a desire to use more of an old dresser, and an inclination to improve my craft area, I came up with this.      I put the bottom/feet and a few other wooden pieces down

Craft Organization - Distress Ink Storage

Image
     After doing a lot of online research, I ended up using Dollar Tree acrylic drawers.      I originally had them in four stacks that "nestled" together so there was a stack "facing"each direction on a Dollar Tree lazy susan.  I labeled the fronts and one side to help see what pad was where, but without a shelf, this system wasn't as convenient for me as I hoped.  Instead, it went into my IKEA closet alongside my wire paper stack.      Hope you're doing well and able to enjoy some of the little things (we're enjoying a bit of blue in our skies - a welcomed sight after the past few weeks of smoky, orange, "Mad Max" skies) . (On with the yammer. . .)      I wanted a system that would be able to hold an ink pad, a reinker, and the foam pad used for the distressing tools.  I thought about using a system called EZStudRack, designed for a multitude of items, screwed into 2x4's. (I found them on YouTube.  They're almost like the sides of thi

Craft Organization - Charm Storage

Image
     After making the drawer-shelf unit I posted here , I decided to use it for all my jewelry craft items (charms, tools, chains, etc.) .  They were tightening the stay-at-home regulations again, so shopping didn't seem prudent.  I went through what I had and tried to organize my supplies better, with the idea that I'd use them more if they were easier to find. . .      I cut down the granola box - magazine file thing I mentioned in my last post .  I glued extra cardboard to double the box's thickness all around since it was going to hold a bit and could get heavy.      I grabbed our box of square sized snack baggies, (without any guilt since we weren't using them for school anymore) and cut down some more cardboard to make dividers.  The cardboard was ugly and from various boxes, so I wrapped them in decoupage along with the box, and printed up labels for each divider and baggie.      Hope you're doing well and hope I was able to encourage or motivate you. (On wit

Craft Organization Idea - Granola Box to Magazine Box Idea

Image
     I "built" something.  Pardon the pic - it looks horrible!  Kinda like a proverbial red-headed stepchild - and I could only think to describe it as if a magazine file fell in love with a box and created an offspring.  But, to use another phrase, this thing has legs, if ya give it a chance and can look past this horrible cover job.        I took a granola bar box from Costco, lifted up the top to make a tall back, glued a big piece of cardboard to it and around the sides, and then covered the whole thing.  I decided against trimming the sides to allow them to offer more support to any supplies housed inside - scrapbook papers, pads, or even some albums fit nicely.  I liked how the sides seemed to almost blend into each other when they were side-by-side.  Not trimming them down could also help them stack better laying down.      - but after all that, I didn't use it as-is.  I thought I could still share it because someone else might find the idea useful and I might make

Craft Table (Adjacent) Shelf

Image
     A video on YouTube (Connie Stewart's craft room tour video, shown here ) inspired me to have a shelf near my craft table.      I found an unused wooden piece and put it on top of my file cabinet to see if it'd work for me.  I figured I could decide if I liked it there or if I wanted it on my table like in the video.  I've put a few things on it and now that I covered the file cabinet, I decided to fix it up as well.      It had a thin edge slightly attached with a few biscuits, so I clamped it and used wood glue.  After the glue dried, I painted it and put it back.      Hope you're doing well and hope that maybe I sparked a bit of creativity or courage in you! (on with the yammer. . .)      Years ago, while watching craft room tour videos on YouTube and trying to get inspired and figure out what to do with my craft space, I came across one tour that had a shelf on a craft table.  I was intrigued.  It allowed space to work on projects and have the tools, etc. within

Craft Table

Image
     My craft table wasn't bought, it was built and pieced together.      The top is made of wood with a light grid laminate glued on top.  Supporting the top is a combo of a metal frame hubs welded and an old changing table.  To conserve floor space, I've nestled several pieces underneath.  I found a large window on Craigslist and added it to the top to help make clean-up easier while keeping the grid in view.      Hope you're doing well - if you have anything you've done in your craft area, please share it (or add a link to your blogpost) in the comments. (On with the yammer. . .)      After decades of crafting on the coffee or kitchen table, I finally had enough of my own space to have a craft table.  I like the craft tables I've seen everywhere online (the ones basically made from 2 bookcases and a table top) , but I'm more of the "use what you have type" with a very limited budget.  I'd rather spend money on things we all need or on supplies