Craft Organization - Dresser Bottom to ScrapRack Support
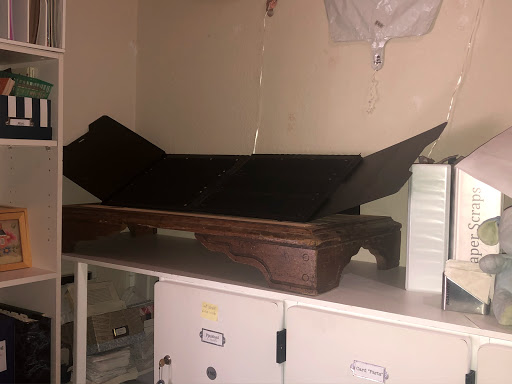
What do you get when you combine the bottom of a dresser with the Totally Tiffany ScrapRack?
You might get what I did:
Why do this? Honestly, it started due to a misunderstanding - but ultimately, gives me more counter space. I have put 3 of my rolling cart drawers underneath, freeing up some room in my bookcase.
Hope you're doing well and maybe I was able to encourage you to try something that may seem odd until you find out it works for you.
(On with the yammer. . .)
Before making a top for my lockers, my ScrapRack was clamped to a scrap of wood that covered the gap between lockers. I had to clamp it because it kept tipping over, even after I went through it and thinned it down. After I made the top, I used filled plastic containers to weigh it down.
A combo of having time to kill, a desire to use more of an old dresser, and an inclination to improve my craft area, I came up with this.
I put the bottom/feet and a few other wooden pieces down on the spot I was using for the ScrapRack and did a trial run to see what combo I liked, if I liked the whole concept, and if I could do it on my own. I soon realized there was another reason to do it - it gave me more storage space. I adjusted my original plans of using more of the dresser pieces to complete the top because I didn't want to add too much height. Instead, I cut more of the bed support pieces I had to fit flush with the frame of the bottom.
While waiting for hubs to find the tool he said he had that would be perfect to attach everything together, I was finally at a place where I looked online to see how other people use their ScrapRacks. I noticed that I had my rack going the wrong way - it was taller than it should be. . . no wonder it tilted! (😣) I thought about scrapping the whole piece, but didn't because the wood was already cut (and cut well - probably the best I've ever done, if I do say so myself) and I did like the idea of more space.
I kept thinking of what I could do because I didn't know if or when hubs would find the tool he was looking for. After a few weeks, I decided to take a leap and trust what I've been told - that screws are just there to keep things in place while the glue dries.
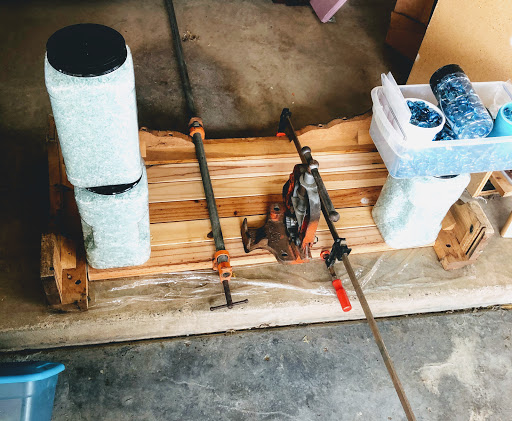
I put some saran wrap underneath to prevent any leaks from getting on our cement porch. (I used one long strip that I moved down as I worked - and I'm very glad I did since there were a couple of places, especially in the corners, where the glue went all the way through.) I used two clamps and some containers as weights (including the ones I previously used to help keep the rack from tilting over). I glued one cut strip into the 3-sided frame at a time and waited until it was dry before putting down the next piece. Luckily, we have a spot where this could just sit around and not get in anyone's way because it took several days to finish.
After it was all done and dry, I carried it inside. I was able to put the ScrapRack on it and finally get the big box I was storing the spinders in out of my craft area! Hubs was a little impressed that I was able to make it and asked if I wanted to borrow some stain for the top. I didn't want to take the rack down and have to get the box back so soon, so I'll put it on the growing list of things to do if/when they bother me or I want to use up some time.
If you're a "pinner," you can check me out at https://www.pinterest.com/daylightdesigns/


Comments
Post a Comment