Quarantine Project #5 - Altering an Old, Metal File Cabinet
I didn't take a before picture - it was ugly and I didn't have the right equipment, but I just wanted to get this done.
This is what it ended up looking like. . .
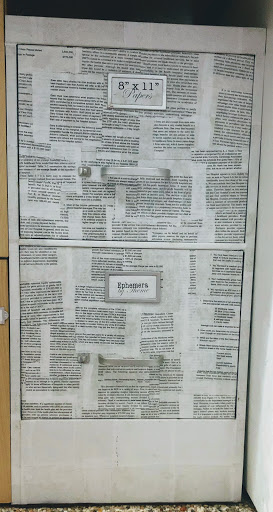

I removed the drawers, which isn't difficult - just needed to get them out of the sliding unit. Once the drawer is opened all the way, pull more. Some cabinets need a little jerk to go past the drawer stop, others need to be lifted a little, but not too much or the slider will come out with it. (If the sliding unit did come out - no worries. Still take it off the drawer and put it back because it will make things more difficult if/when you move the drawer around.)
To remove the bookplate and handle, unscrew the two screws for the handle - you might need an allen wrench*. That will allow a plate/cover on the inside of the drawer to be removed and expose the metal tabs to remove the bookplate. (You might choose to figure out how to remove and reassemble the sliding release button, but I left it alone and just worked around it.)

The plate/cover was nestled in the top of my two cabinets, so I had to push it down before I could pull it out. Now the drawer is ready for whatever you have planned - sanding, painting, decoupage paper, or even fabric.
I opted to decoupage with old textbooks I had because I didn't have paint and couldn't justify a trip out to get any.
Hope you're doing well and hope you've somehow carved some time in your day to meet one of your own needs, no matter how small.
(On with the yammer. . .)
This file cabinet was ugly. I'm not just talking about the late 60's-early 70's baby poop/mustard yellow paint either. It had lots of scratches and s.o.u.o.'s (splotches of unknown origins). It was something I saw every time I sat down at the table.
Before being cooped up for five months with three other cranky, slightly scared, definitely bored-beyond-anything-they-had-ever-experienced-before humans, I'd just let it go. But this is a different world. And, this was something for me to do. Sure, it'd be in a hot room, but nobody else would want to be in there (except to ask a quick question now and then or to tattle). So, it would be multiple chunks of time spent in relative peace. Worst case scenario, I'd waste time - maybe even a lot more if I had to undo anything. I decided to just go for it since I realized wasting time was no longer a deterrent, no longer placed in the "Con" side of lists, and time wasters are currently welcomed, cherished, and sought after. (Anyone see how I tripled down with the coordinating conjunctions? The ex-teacher in me cringed a little, but aren't blogs "informal writing" and don't have to stick to the rules for sentence starters? Since I've gotten into the habit of searching the internet to help me prove things, Google just told me that when writing informally, "you can start with every possible word you can imagine." - which brings up a question I gotta ask - am I the only one who has to go online to prove what I've said isn't wrong or made up when disagreeing with their children??. . . sorry, but I've had to do this enough times I had to ask!)
A few years ago, hubs said he'd paint a larger file cabinet for me if I got it ready and he just had to spray it. While getting it ready, I tinkered a bit to learn out about the construction. I then dragged it outside to our front porch in several pieces, awaiting a coat of white. After several months (I lost count - more than 6), I got tired of having to walk past the lingering debris everytime we went somewhere and having to walk around several full boxes when I was in my craft area. True, weather got bad for painting more than a week after I put it out; and naturally, more important projects popped up - so I drug it back in and put my supplies away, realizing I'd just have to live with it until I built up the courage or had the time to do it myself.
Cut to now, I didn't feel like I could lose anything and was motivated to try something with the smaller cabinet. If I liked it, I could finally improve the larger cabinet.
Unfortunately, I didn't have any of the "right" paint for this job. CA is tightening up their stay-at-home orders again, so getting some wasn't going to happen. (Maybe after the elections?) Add to that, it's hot. We also have more wasps and bees than we ever had before. (Thankfully, they're not murder hornets, killer bees, or whatever new horror bug is looming out there - slasher/torturer wasps?) Basically, painting was not an option and wasn't going to be any time soon.
Figuring out how I was going to cover up the s.o.u.o.'s took a lot longer than disassembling because I remembered how I did it before and this cabinet wasn't very different. (I doubt any old, metal file cabinet is unique in its construction.)
What did I have to use? I had old textbooks that were either going to go into the recycle or possibly in the fireplace as kindling. . . so back to ol' decoupage. I had enough paper that was blank on one side to cover the "shell" to have a bit of a contrast like I've seen on Pinterest and might look a little better from the back.
It might look a little odd, isn't how it'd look if I had tackled this project earlier, but it looks better than it did. I'm pleased with it enough to have started doing it to the taller one that's next to my craft table.
- - Now, tips for any inexperienced (or somehow hesitant) people out there who either kept reading or scrolled down to see what the earlier * meant . . .
* I found that pliers work in place of an allen wrench to remove the two screws. Why would you need to know this? Maybe you don't have a set, maybe you somehow can't easily get to them, or you're like me and can't find the right-sized one. (I found 9mm and 7mm sized wrenches but naturally, needed an 8mm one. . .maybe yours walked off and joined mine on some exciting adventure?) With social distancing, you don't want to disturb neighbors or expose your in-laws to any more than they already are (even when you know Dad has more than one of every size).
* An old habit I have to prevent losing screws is to lightly "re-screw" them with my fingers into the removed piece - enough to keep them together and not have the screws fall out, but not tight enough to make it difficult to remove.
* I left the sliding release button alone because I didn't want to mess with it and end up with a drawer that couldn't open or close because I lost some small but crucial piece or couldn't put the spring back right (it's the type of thing that is guaranteed to grab my kids attention and I could easily see it getting bent out of shape or "spring free" and fly magnificently before disappearing as it was played with). There was enough space underneath the buttons that I could slide a piece of paper underneath it a little without interfering with it. I slid it back and forth to make sure I didn't place the paper too far over and block it or force it to tear the paper and possibly gum up the works. If I were more skilled (or had less interruptions) I might have removed it but I don't know if having a smoother spot instead of a small patch of smaller pieces would be worth the time or any risk involved with rebuilding the mechanism.
If you're a "pinner," you can check me out at https://www.pinterest.com/daylightdesigns/


Comments
Post a Comment