Quarantine Project #4 - Drawer Shelf Unit
I had space under my craft table and wanted to make a bookcase. With COVID still an issue, I decided to get creative and just get it done. I used some drawers I had.


If you're a "pinner," you can check me out at https://www.pinterest.com/daylightdesigns/
If you want to see my other blog, it's at http://daylight-designs.blogspot.com/

I checked to make sure they fit in the space, then had to decide the spacing. (I used an empty box to help me guess better.)
 I attached feet for the two upper drawers to the middle drawer so the upper and lower drawers could slide out. I used wood glue to attach more scrap wood to the thin underside of the middle drawer for extra stability. Using the supplies and limited skills I have, I decided to keep it simple and use three long "support beam" being held up by feet for the upper drawer. (Anyone who wants the correct terms, I chose to use a butt joint.)

Biscuits and wood glue were used to connect all the pieces. I used a sealant inside the drawers to prevent more splinters.

Hope you're well and as always, hope this may have sparked something good for someone else.
(On with the yammer. . .)
I found a dresser on Craigslist that I thought about fixing to use on our front porch for gardening equipment (the previous owners had one there and we liked the idea), but it didn't fit in the space and would block an outlet we use. After sitting on our porch for a few months, I finally felt like I had more to lose by leaving it there than trying something/anything, so I took some tools to it and took it apart to "save" what I could and trash what I couldn't use. Some of it went into the trash, some into a wood pile, and the drawers went inside. One drawer was damaged, but I kept the front thinking I could make a coat rack of sorts like some I've seen online.
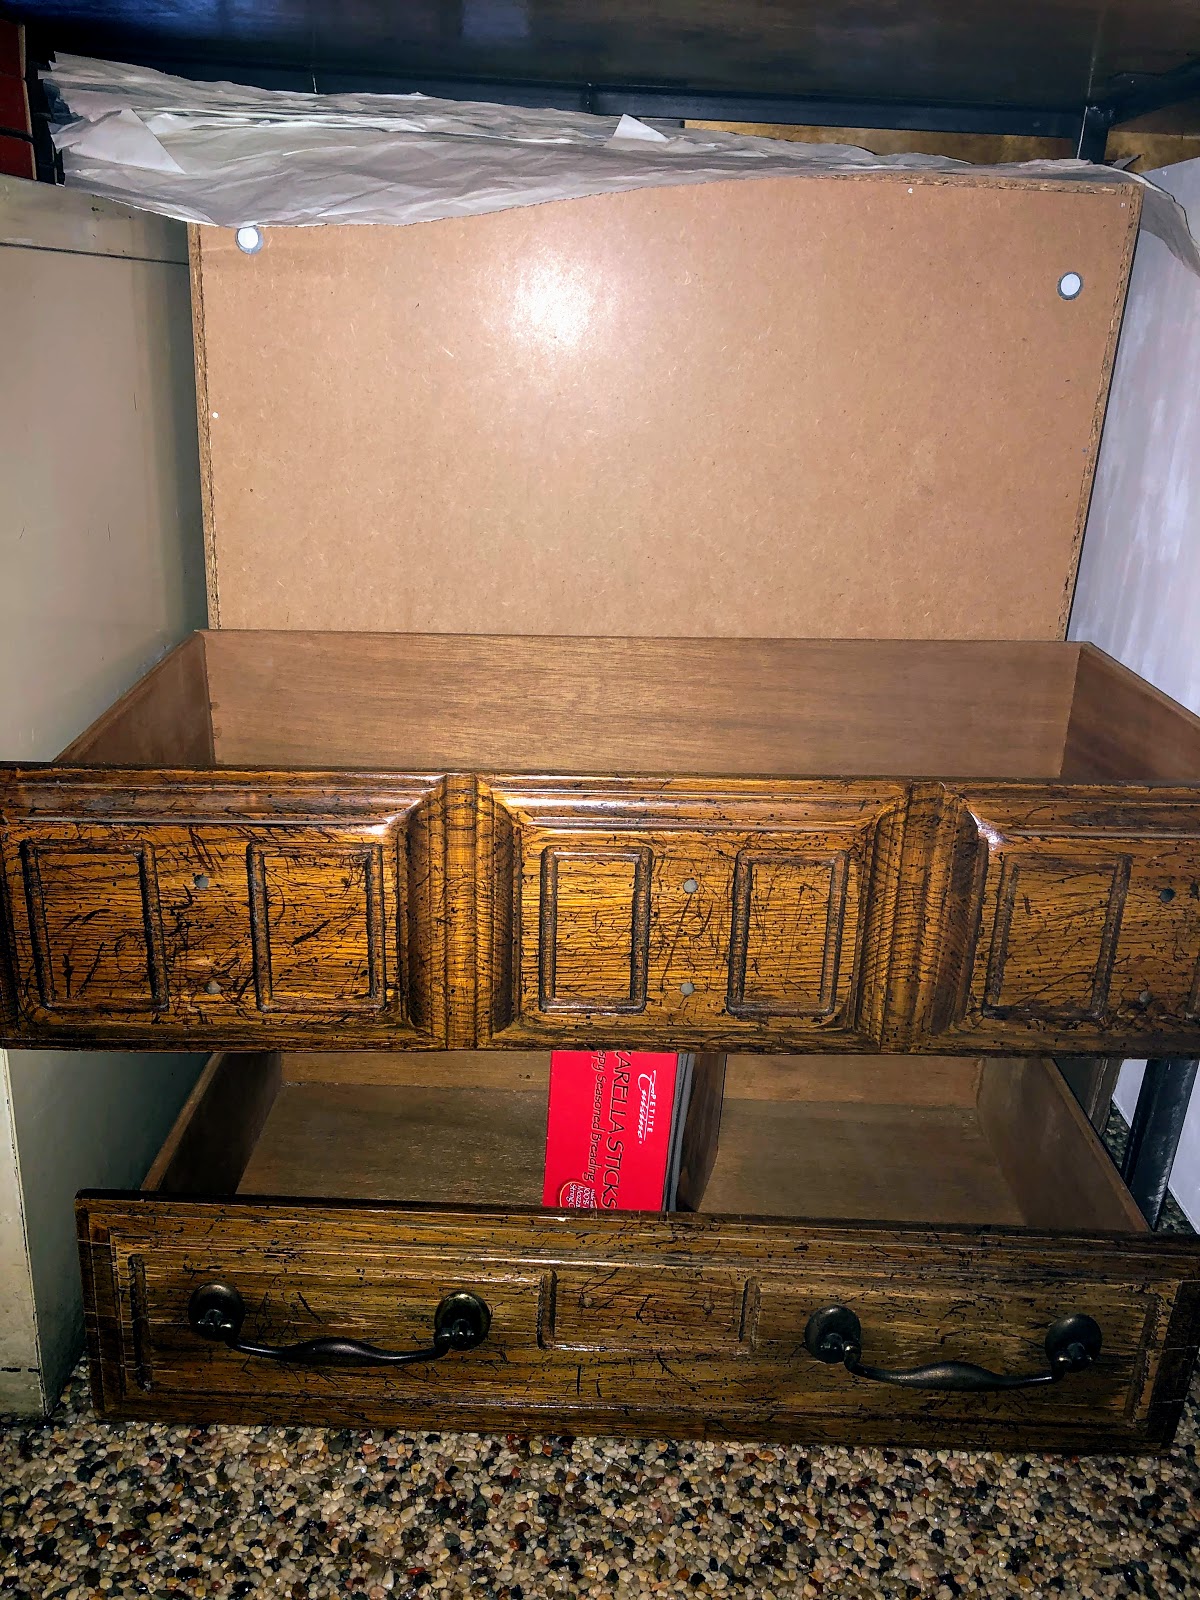
Under the table that hubs built, there was an empty space. I was planning on building a simple bookcase to fit, but I used the wood I had for the craft corner. I tried the drawers and the bigger two just fit, but there wouldn't be room for a bookcase shell. As I was wondering how to mount something to metal on one side and wood on the other, my son needed his bed replaced - so now I could use his bed supports for this project. They were thin, so seemed like they could be used as "legs".
I used bed supports to raise the two top drawers. I used the middle drawer as a base to make all three sturdy enough for two other drawers to slide out. The middle drawer was going to permanently sit on some feet, but the upper drawer needed a little more wood than that if it was going to slide out. Using the supplies and limited skills I have, I decided to keep it simple with three long "support beams" being held up by feet. (Anyone who wants the correct terms, I chose to use a butt joint.)
Like most drawers, the bottom was thin and I was concerned it might break. I decided to glue more of the supports on the bottom of the middle drawer. I positioned the feet on the supports to make them hold the weight of the drawers.
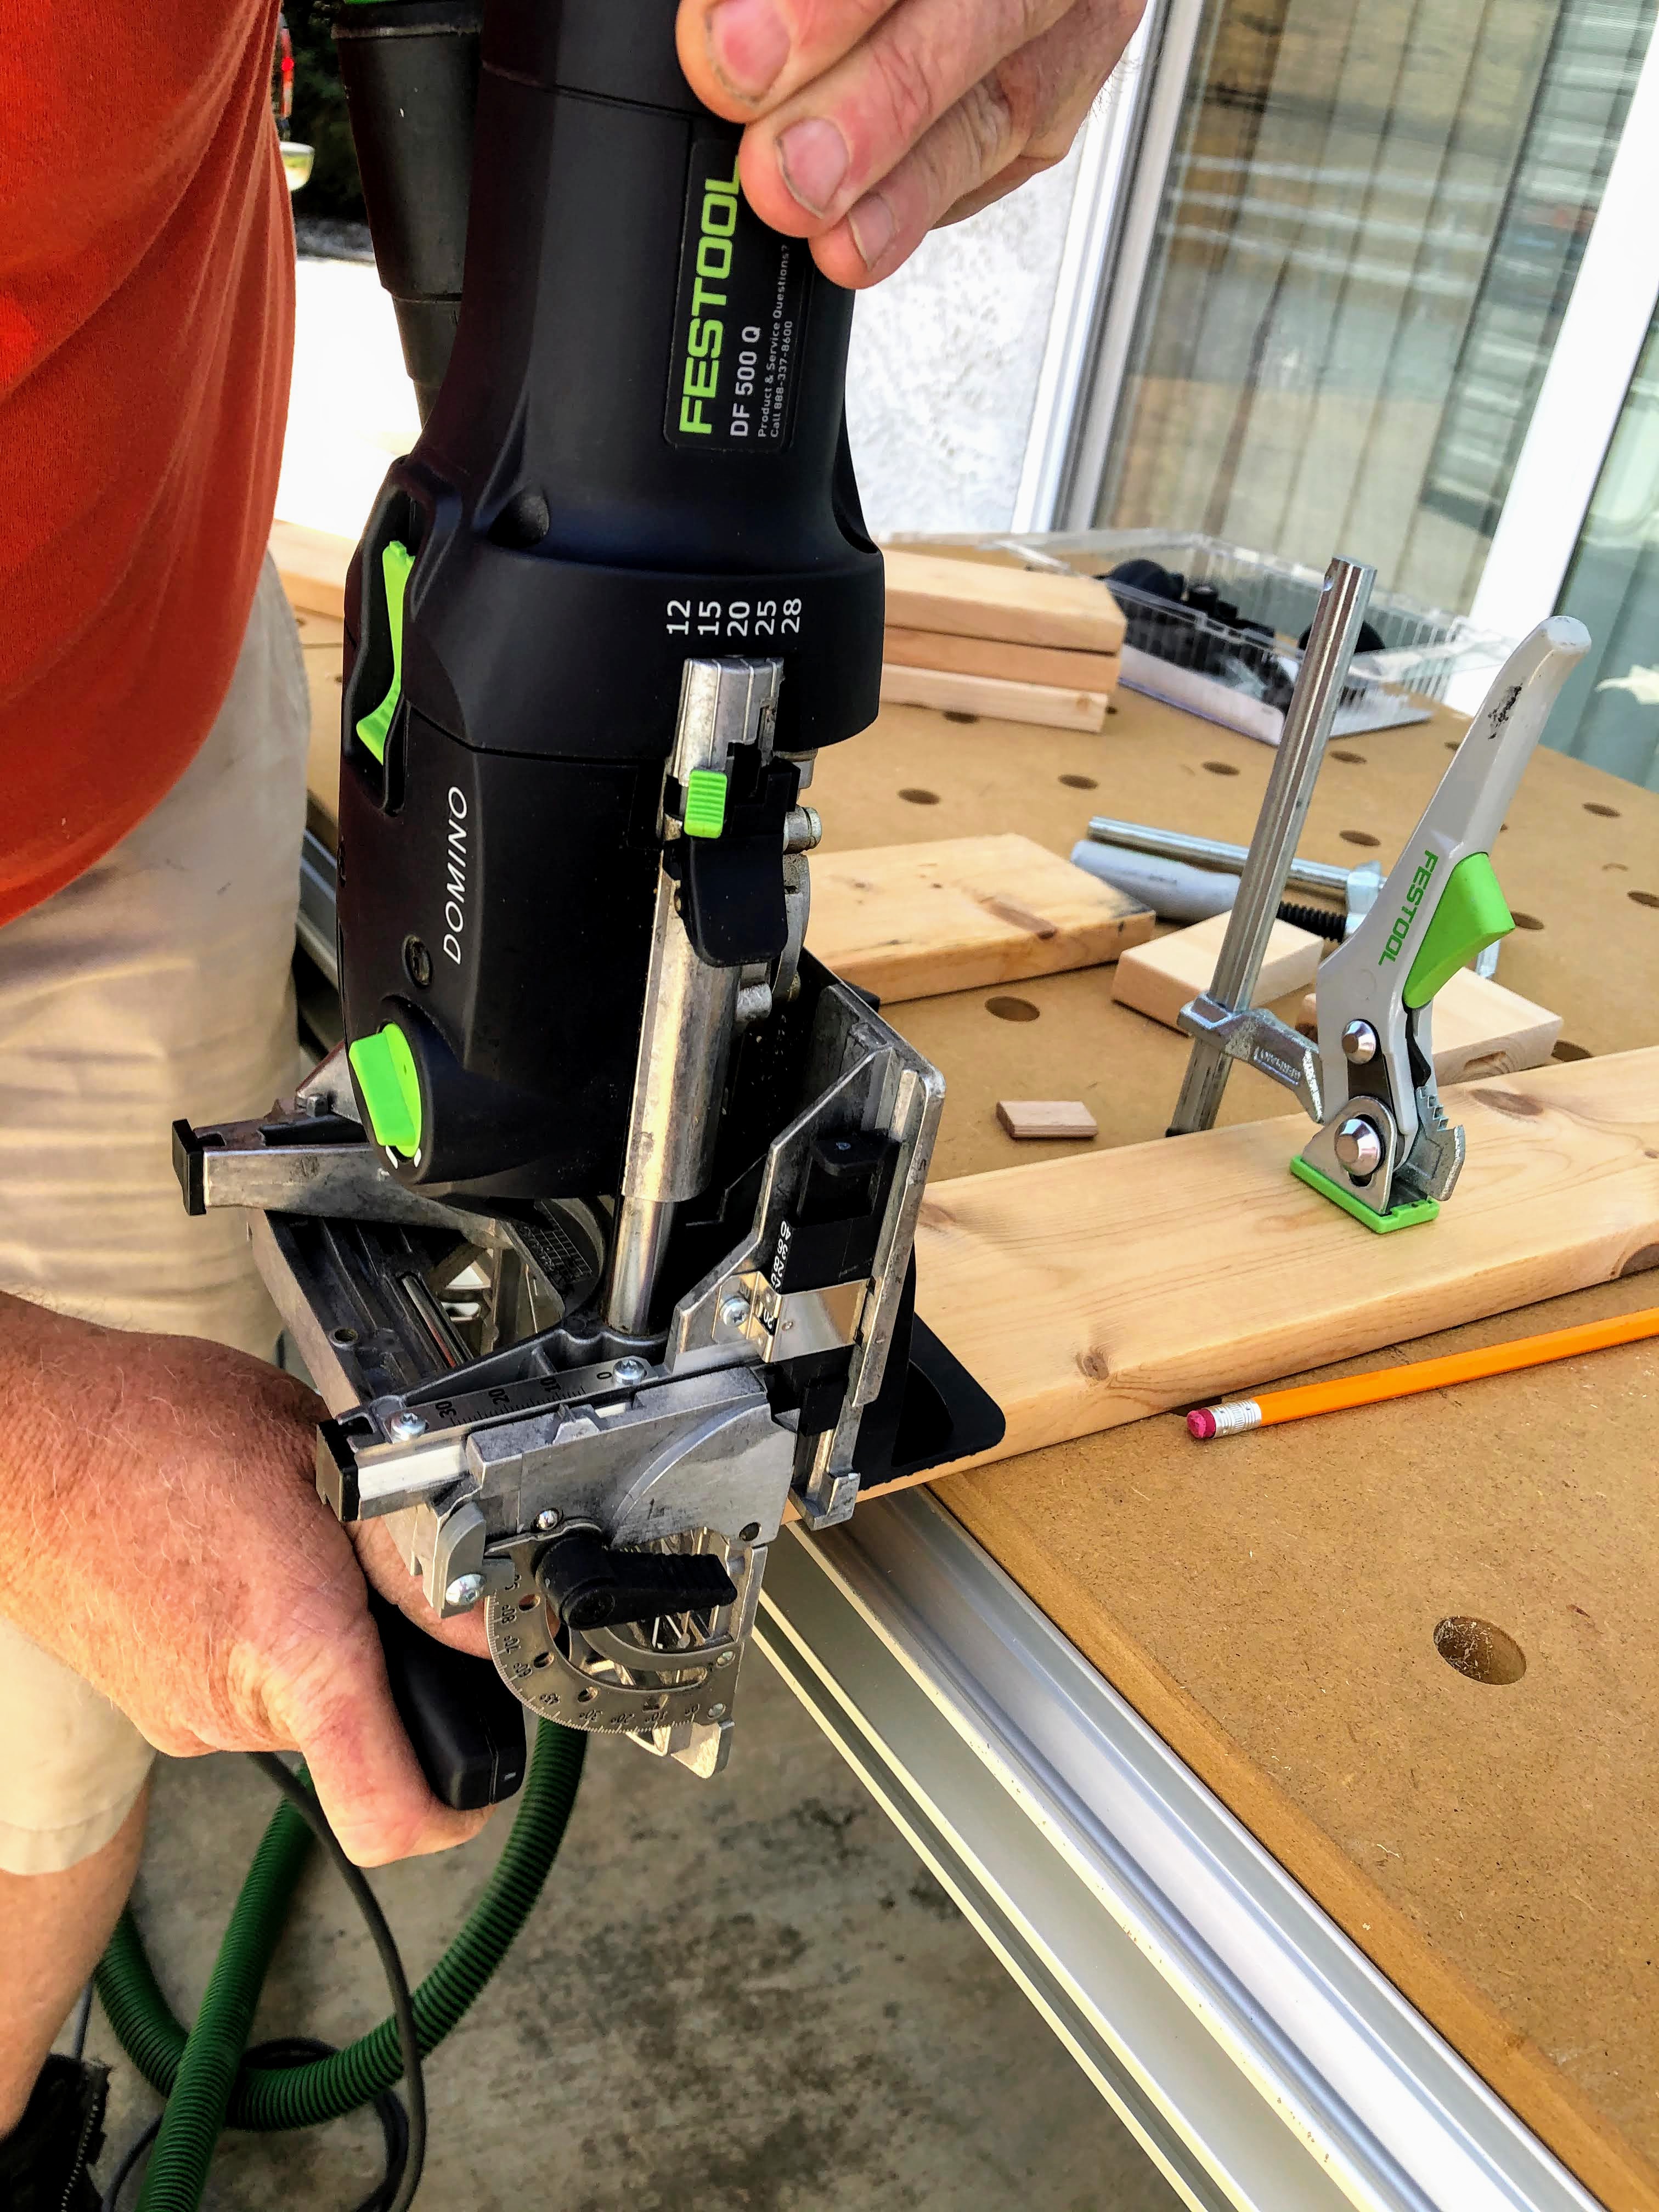
I got out the ol' miter saw and cut the bed supports to the lengths I needed. I had planned on screwing the bottom supports/legs - through the drawer bottom, sinking the tops of the screws as much as I could so I could glue the top supports directly on top of the screws, but was a little nervous about making everything fixed in the right angle. When I asked hubs his opinion/advice, he had a different solution. His Festool biscuit cutter!
We lined up the two boards perpendicular to each other, drew a line that marked both boards, then used his Festool. His plastic stoppers and table held the board in place and were easy to remove the board and put the next one in place.

The biscuit cutter has built-in rulers with a center mark, making it easy to line up with the pencil mark we made. (I did a few too - I wanted to learn how to do it on my own in case I ever needed to.) We did the same procedure with the vertical supports, but had to move the tool around.
I glued the edges using wood glue, put in the biscuits, and clamped everything until the glue dried. The smallest drawer had a corner that was starting to come apart, so I put wood glue on it. I wiggled it to get more of the glue into as much of the dovetail joint cracks as I could and seal up the joint. I noticed that another drawer was starting to come apart, so after finding more wood glue, I decided to add a stripe of wood glue to all the others as well. (Ounce of prevention, pound of cure. . .)
The drawers are rough, so I wanted to do something to the insides to prevent me from getting more splinters whenever I used them. I used the drawer front I had to test a few options and see what would work. I painted one corner with acrylic paint, and covered another corner with decoupage. The decoupaged corner was a lot smoother, but something from the wood leaked through and there were tanned spots/marks. I tried putting down a layer of DIY Mod Podge first (3 parts Elmer's glue to 1 part water), then decoupaged, but there was still leaked tan splotches. Not sure what the tan is, so I decided to just seal it up. Luckily, we had an old, little tin of Minwax.
I brushed the drawers to get as much of the debris as I could, and then painted the sealant on. After letting it dry for over 4 hours, I lightly sanded using 240 sandpaper (the container called for 220, but the sandpaper sample pack I got from the Dollar Tree last year didn't have that) and applied a second coat. The container suggests letting things dry for a day once finished, but I decided to let it sit longer in the summer sun and heat to make sure I could get as much smell out of it as I could and make sure I didn't have any supplies stick to the sides.
When I noticed the drawer bottoms reminded me of my boys' dressers, I wanted to do something about it. My boys aren't gentle on their dressers and have had problems with the bottoms popping out. An earlier online search told me that wood glue is stronger than the white glue I've been using, so I thought I could fill in the cracks of the seams with it. I liked the seal it made, so I used it on all the dovetail joints. I didn't want any of it to run, so I put one line down, propped it up, hoped gravity could help me put more of it in the crease, and waited for it to dry. Once dry, I'd rotate it and do it all over again. It might not do much, but hopefully the sealed joints wouldn't need much extra help. Also, I'm not as rough on my furniture as my boys and wouldn't want to put anything real heavy in it. Even if it does nothing to help/prevent the bottom popping out, it'd prevent anything small from slipping into the crease (there were a few paperclips, pennies, and a button in a few creases when I took the dresser apart, and I wanted to prevent any of my supplies sliding in and possibly getting lost).
While waiting, I decided to seal the rest of the drawer front (the parts that weren't already covered, that is) to see if decoupage is an option or not. The sealant coated the wood enough to help prevent splinters, but still wasn't sure if I was just going to leave it as is or not. If it didn't have the leak problem, maybe it'd help lessen the smell? I'm toying with using the bottom/feet of the dresser for another project, so I might want to keep the wooden look, but I might still like the look if it's lined with the white/black decoupage. . .
If you're a "pinner," you can check me out at https://www.pinterest.com/daylightdesigns/
If you want to see my other blog, it's at http://daylight-designs.blogspot.com/


Comments
Post a Comment