Posts

Craft Table (Adjacent) Shelf
Image
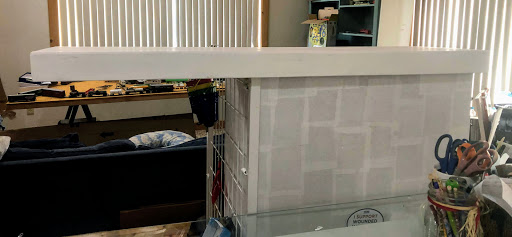
     A video on YouTube (Connie Stewart's craft room tour video, shown here ) inspired me to have a shelf near my craft table.      I found an unused wooden piece and put it on top of my file cabinet to see if it'd work for me.  I figured I could decide if I liked it there or if I wanted it on my table like in the video.  I've put a few things on it and now that I covered the file cabinet, I decided to fix it up as well.      It had a thin edge slightly attached with a few biscuits, so I clamped it and used wood glue.  After the glue dried, I painted it and put it back.      Hope you're doing well and hope that maybe I sparked a bit of creativity or courage in you! (on with the yammer. . .)      Years ago, while watching craft room tour videos on YouTube and trying to get inspired and figure out what to do with my craft space, I came across one tour that had a shelf on a craft table.  I was in...

Craft Table

Image
     My craft table wasn't bought, it was built and pieced together.      The top is made of wood with a light grid laminate glued on top.  Supporting the top is a combo of a metal frame hubs welded and an old changing table.  To conserve floor space, I've nestled several pieces underneath.  I found a large window on Craigslist and added it to the top to help make clean-up easier while keeping the grid in view.      Hope you're doing well - if you have anything you've done in your craft area, please share it (or add a link to your blogpost) in the comments. (On with the yammer. . .)      After decades of crafting on the coffee or kitchen table, I finally had enough of my own space to have a craft table.  I like the craft tables I've seen everywhere online (the ones basically made from 2 bookcases and a table top) , but I'm more of the "use what you have type" with a very limited budget.  I'd rather spe...

Craft Organization - Thrift Store to Project Supply Holder

Image
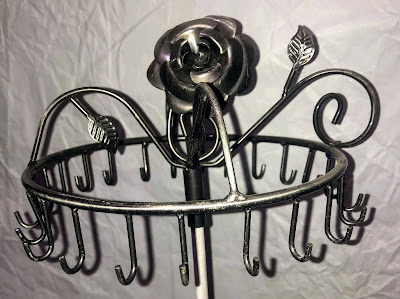
     This metal piece at a Salvation Army store "leapt" out at me.  I've never seen anything like it so I didn't know what it's missing "base" was supposed to be or look like.  I had to use my very limited imagination to make it useful.      I decided to turn it into something to hold supplies, similar to a small Clip-It-Up.  I searched for some clip ideas.      At IKEA, I found these shower / curtain hooks.      I could also use the paperclip looped thru' a clothespin idea. . . I found 3 sizes, all reasonably priced at Dollar Tree and at Walmart.      Depending on what I'm hanging, I could also go with some free options by using old pencil pouches and various packaging from socks, curtains, or plastic clam shells that have the store display punch cut out. . .      Now, I needed a "base."  For height, I used a wooden dowel in a Coke bottle.  To prevent it from tipping, the ...

Craft Organization - Copic Markers

Image
     As you probably know, Pinterest has many beautiful pictures of Copic storage.  Pictures of products like Art Bin Marker Storage or units built for IKEA Expedit  and homemade versions using  ovc electrical  conduits, egg crate ceiling light tiles,  cut pvc pipes, glued CD cases, and repurposing cassette or CD storage racks.      I had one of the later, so I used it.      Unlike most of the pinners I saw, I used cut acrylic sheets I already had to create "shelves" instead of empty CD cases.  They take up less space and make it easier to grab the markers.      Thanks for looking.  Hope you're doing well!   (On with the yammer. . .)     This isn't my first Copic storage.  After taking a card making class, I went out and bought some stackable, plastic containers from Target on a recommendation from the teacher, Irina Blount.   (A few years after I took some of her...

Craft Organization - Die Storage (thin metal types)

Image
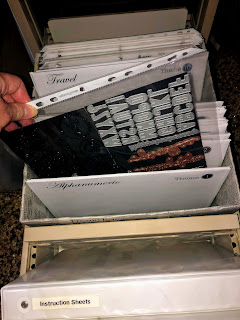
     My last post was about the top part of my die cabinet  (here) , so thought I'd share the bottom part where I put my Sizzlits and other thin dies.      I use page protectors.  Loaded page protectors can go into binders, fridge bins, baskets, magazine files, boxes, or even be tied together with string or a loose ring.      My Sizzlits are in either regular page protectors (I sewed pockets into them)  or baseball card protectors, then put into a binder.      My thin, metal dies are placed on magnetic vent covers before going into page protectors and placed into a Ritz box from Costco.      Thanks for checking my quick idea out.  If you have another system or idea, please share - I'm very interested and I'm sure I'm not the only one.      As always, I hope you're doing well and hope that maybe I sparked a bit of creativity or courage in you! (On with the yammer. . .)   ...

Craft Organization - File Cabinet Die Storage (Sizzix original/Bigz)

Image
     Some might argue that being crafty is all about making things.  I think sometimes it's about using what you have and making it work for you.      I took an unused file cabinet and made it store the thick, steel-rule dies.      Along the right side, you can see the magnetic labels I made to help find dies easier.      Thin plywood lines the bottom of the drawers and create dividers to help keep rows and themes separate, even if the drawers get slammed shut.  This can fit Sizzix original, Bigz, XL, etc. - the small and medium dies could fit, but might be a little difficult to take out.  The only ones that wouldn't fit are the Pro sized dies.  If I were to put the small or medium ones in here, I'd probably put them in boxes or baskets to make it easier to get to them.  I didn't try that because I have them in other areas.      Thanks for checking my idea out.  Hope you're doing ...

Craft Organization - Paper Storage

Image
     After searching the internet, I decided to try my hand at the wire cube hack for my paper.            It isn't too complicated, so most of the sites I saw it on didn't have too many details.  I used zip ties in several spaces to hold the shelves up and spaced them about 2 inches apart.      Only thing that might be a little different is that I made mine tall and put it in my IKEA closet.  It keeps the paper from being directly in the sunlight and helps keep things out of sight when I leave my area.       Hope you're doing well! (On with the yammer. . .)      I started with the generic paper cube with the vertical dividers that were everywhere awhile ago (the same one I had to fix in an earlier post ) .  It works for my solid cardstock, but after a few deals at Scrapbook Expos and getting paper on sale from Michael's, I needed more storage for my printed papers.     ...